

You may be familiar with Chalk Paint™ and not realise that Annie Sloan also has a series of products to use for decoupaged furniture, in fact pretty much any kind of material can be decoupaged with her products. Recently I was fortunate to meet Annie Sloan and her Marketing Manager, Charlotte Freeston, on a flying visit to Auckland. I had already attended an advanced decorative course at Le Monde on decoupage, so I spoke to Annie briefly about the possibility of using these products on a canvas as a mixed media. Annie informed me a number of professional artists are already working with her products, so when I saw the Oka birds, I thought they were the perfect project to attempt with Annie's range of products.
Below: My initial inspiration

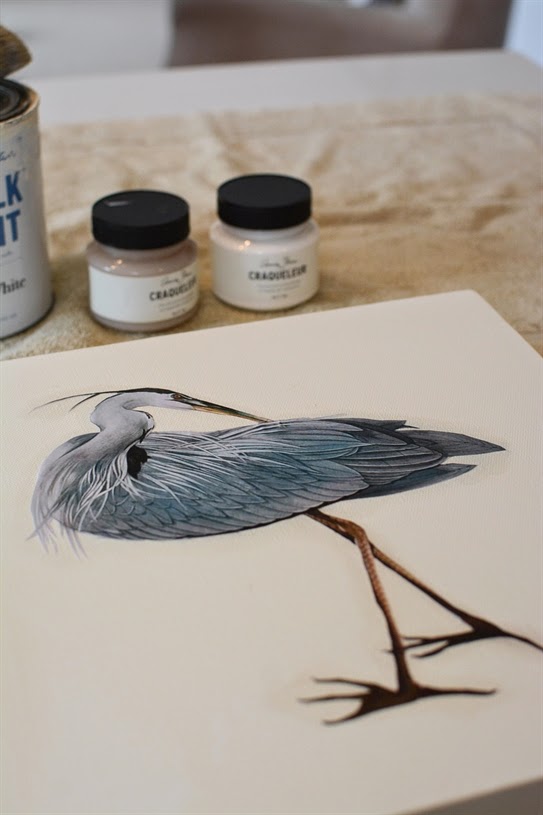
MATERIALS REQUIRED
- Chalk Paint™, your choice of colour for the background (I used Old White)
- Craqueleur Step 1 and Step 2 (Annie Sloan)
- Decoupage Glue & Varnish (all in one jar - Annie Sloan)
- Annie Sloan's Dark Wax & Light Wax
- Fine scalpel for cutting and protective cutting mat
- Downloaded image from the internet (The Graphics Fairy.com) or image from magazine, book etc
- Flat brush for applying paste and craqueleur (can be washed out with water)
- Brush or cloth for applying wax
- Pre-stretched, pre-primed, artists canvas (can be bought from stationery store). I like to use the deep sided ones rather than the narrow sided
I downloaded my image from The Graphics Fairy. I chose a bird similar to the ones in the Oka pictures. I also downloaded some shells for a friend who also wanted to try out the technique.
.jpg)
Image via The Graphics Fairy. Tip, to search for images on this site, it is easier to go to the tab marked 'categories' as it will bring up far more images than searching a specific subject. Categories are broken down into flowers, birds, shells etc.

Above: Plan where you will place your decoupage before you start cutting it out.
Paint your canvas your desired colour, I chose Old White. Allow the canvas to dry completely before the next step (2 coats is preferable). While it is drying you can cut out your decoupage. It can look great with a coloured background as seen in the tiles on the in the tutorial I attended at Le Monde.
Note: If you are using a full sheet and not cutting around images, there is no need to paint the canvas. The dark wax will tint the background when applied.

Above: Using a fine craft knife, cut carefully around your image. It is nice if you can achieve some fine detail as I did with the lower feathers. Hint: If you use a pair of scissors and let the paper do the work you will achieve a finer edge.

Above: The completed cut out

Above: Reverse your decoupage, pasting the back with the decoupage glue with an acrylic flat brush. It is advisable to paste the canvas or furniture you are placing it on not the paper, however, this is difficult with a fine piece like this bird. I found I needed to work quickly as it dries very quickly in a warm environment and I had the heating on.
Above: Quickly place your decoupage onto your canvas, make sure it is perfectly placed then press down to make sure it is sticking everywhere. If it is lifting slightly, lift that area very carefully and apply more glue. Allow 10 minutes for it to dry (use a hair dryer if you wish).
Note: The glue is also a varnish and will dry clear so you can paste gently under and over the edges if they begin to lift. If you are not requiring a crackled effect you could simply use several thin layers of the glue to seal the entire piece.
Note: The glue is also a varnish and will dry clear so you can paste gently under and over the edges if they begin to lift. If you are not requiring a crackled effect you could simply use several thin layers of the glue to seal the entire piece.

Above: Apply your first coat of 'part 1' of the (2 part) craqueleur with a brush - This should completely cover the canvas and the decoupage. Allow it to dry completely (you can use a hairdryer to speed up this step).

Above: Once completely dry, apply part 2 of the craqueleur process with a medium size 1" acrylic flat brush. You can use a hair dryer to speed up the drying time. If the cracking is not enough, once dry apply another layer of the second coat. Make sure you coat the complete canvas, not just the cut out you are using.
Above: If you look carefully you can see the cracking of the craqueleur. You do not want to apply any wax until you have cracking over all of your canvas, including the decoupage. I found that my first layer didn't crack very well so I applied another coat of part 2 of the process, making sure it was a thicker layer. I find the thicker layers seem to crack better and again you can use a hair-dryer to speed up this process.
Note: Do not apply it too thickly.

Above: The finished project with an application of dark wax and one coat of clear wax (see further down the page for instructions on applying the wax)

Above: Close up of the craqueleur effect with the dark wax applied.
Hint: I was in a slight rush with this project and as you can see by the birds crest I didn't cut close enough to the black lines. However, I could have used a dark, permanent marker to fill in the gaps. You do want to get as close as possible though to the edge to achieve a seamless finish.
APPLYING THE WAX

Above: Applying the dark wax. I had a friend around to teach her how to use the decoupage technique on canvas. Kathy chose some shells printed over an old map. This technique would be perfect to give the print an antique look. Applying Annie's Dark Wax with a brush will get into the cracks better than using a cloth. However, we chose to use a soft cloth to rub the wax into the crevices in a circular motion. Once the wax is applied to the crackled effect, it magically comes to life.

Above: Once your layer of wax is dry (about one hour), apply one coat of clear wax. Allow the clear wax to dry until the 'tack' has gone. Using a clean soft cotton (lint free) cloth, start to buff in a circular motion until you have a slight sheen. You can apply another layer of wax once the first layer of clear is dry. The clear wax adds further protection.

Above: Kathy's completed work - The shell image was found on Pinterest and required little cutting out as Kathy wanted to retain the antique map in the background. Kathy simply glued the A4 Sheet directly on the canvas, leaving a border either side.

I was pleased with the results of both pieces and I hope you found this tutorial inspiring enough to attempt something yourself. This method can be used on canvas, wood,furniture in fact most surfaces. You can use images from books, magazines, or a downloaded image printed onto A4 photocopy paper, as above.
For my next project, a friend of mine has a beautiful antique side table, decorated in decoupage and gilding, I am on the lookout for a similar shaped table to mimic the idea using a slightly more advanced decoupage technique with gilding. You can learn these techniques first hand, at the courses currently being run at Le Monde (see link above).
For my next project, a friend of mine has a beautiful antique side table, decorated in decoupage and gilding, I am on the lookout for a similar shaped table to mimic the idea using a slightly more advanced decoupage technique with gilding. You can learn these techniques first hand, at the courses currently being run at Le Monde (see link above).


No comments:
Post a Comment